
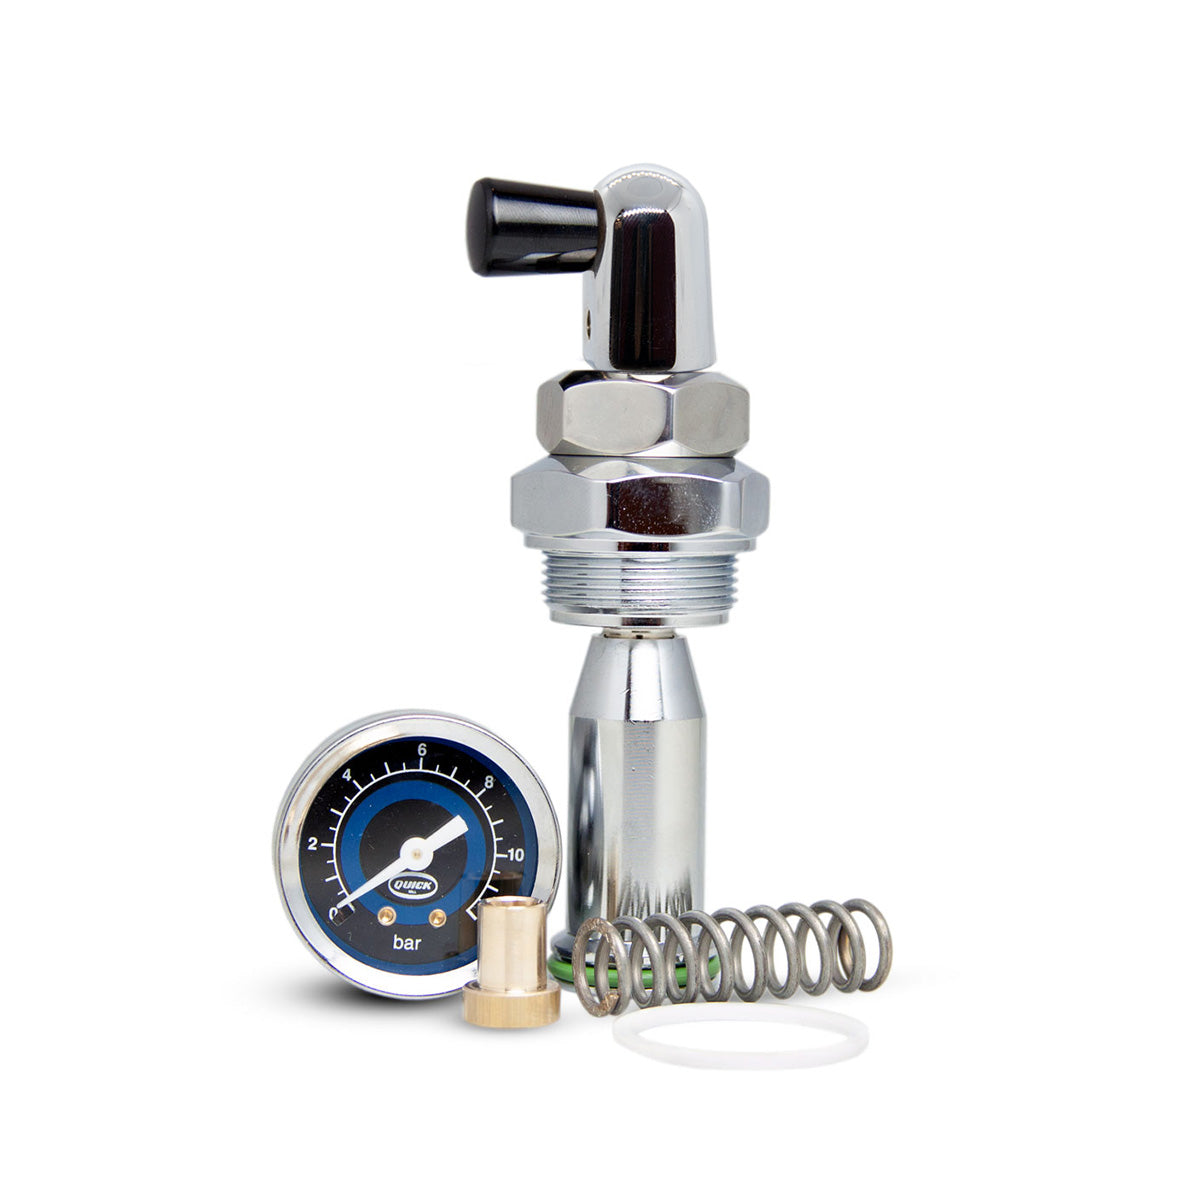
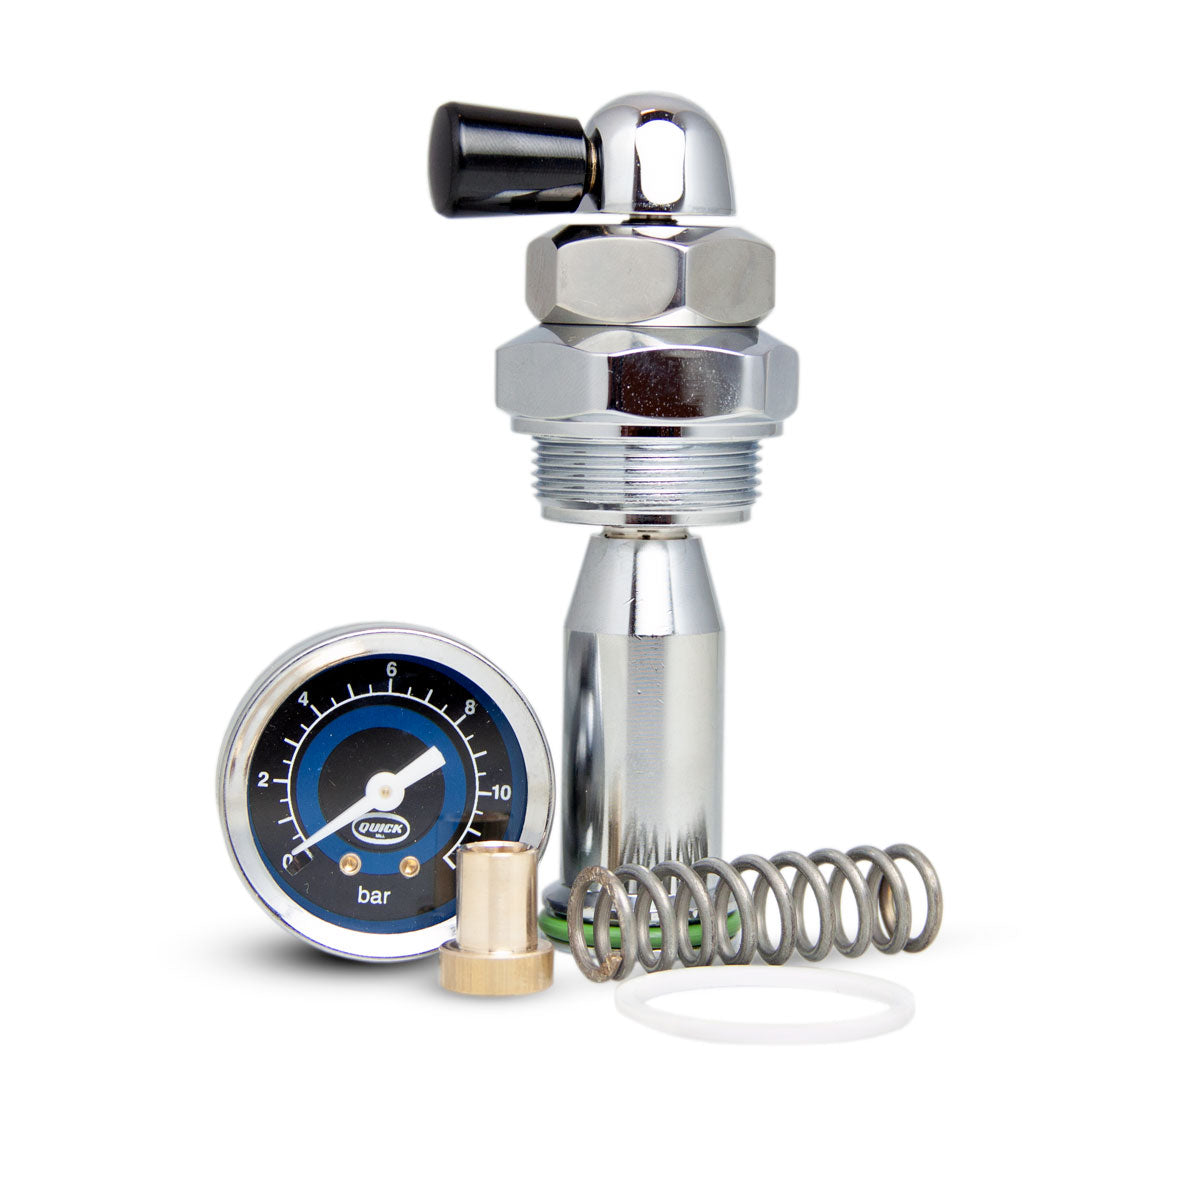
E61 Flow Control Device
In stock
Quick Mill Parts
Quick Mill
KIT0995RFLC
Share:
Disclaimer, Please Read
WARNING! Please note that we are not responsible for any damage before, during, or after installation. Damages can include, but not limited to:
- Over-tightening the gauge into the group head (causing the gauge thread to break and threading broken inside the group head). Replacement Linked here.
- Breaking of gaskets and o-rings,
- Scratches on mushroom,
- Over-tightening of gicleur, and/or
- Limescale build up.
If your machine has an E61 group head, YES this product should work. We can only confirm with certainty that it is compatible with any Quick Mill, Izzo and Rocket machine being that those are the machines we stock and sell here. However it should also work on any Expobar, Bezzera, ECM or Profitec machines as well. Please read our returns & exchanges policy before ordering.
Machine Compatibility
Izzo
- Duetto
- Duetto Evo
- Vivi PID
Quick Mill
- Alexia
- Carola
- Anita
- Andreja Premium
- QM67
- Vetrano 2B
Rocket
- Appartmento
- R58 Cinquantotto
- Mozzafiato - both models
- Giotto - both models
Isomac, Expobar and ECM, as long as they have an E61 group, will also be compatible.
Manual Flow Profiling
With the Quick Mill E61 Group Head Flow Control Device you can manually profile your extractions by adjusting the flow from the closed position (0-bar) to full pump pressure, usually 9-bar. This E61 flow control device can work on many common machines like the ECM flow control device does.
The flow control device can be installed in machines that are equipped with standard E61 group heads. With just a couple of tools, your coffee machine will be able to vary the amount of flow using the stainless steel needle valve now installed on your E61 group. This needle valve is the main working component that allows the user to vary the flow of water to your coffee where you’ll have full control of saturation and extraction of all that you love about your espresso!
The Flow Control Kit replaces the E61 spring with a stiffer one that does not compress unless manually activated to drain excess pressure through the exhaust. This is so that you do not have to manually manage the pressure of controlling the flow restriction while simultaneously compensating for the pressure difference as that pre-infusion valve compresses.
Installing the E61 Flow Control
The Quick Mill flow control kit provides you with all of the necessary pieces you’ll need to install it to your existing E61 group. It installs on the front of the group with just a couple of tools required:
- Teflon Tape
- Electrical Tape
- 5mm Allen Key
- 12” Adjustable Socket Wrench
When installing your new gauge, we recommend that you very gently screw in the gauge just until it is barely finger tight. Then unscrew it until the gauge is upright. Then unscrew it, counting the number of rotations you go through. From there, wrap the male threads of the gauge with teflon tape and tighten it back in that same number of turns. That way it will both be in the position you want, and also seal so that it does not leak.
If you have any questions or concerns, please do not hesitate to call or email our service technicians during business hours (Monday-Friday 8am-5pm EST) at 518-452-5995 or email support@chriscoffee.com
Once you have gathered all the necessary tools required for installation, just follow these easy steps.
- Wrap the top of the mushroom with electrical tape to prevent it from getting marred by the 12” adjustable socket wrench.
- Loosen the mushroom at the top of the group with the adjustable wrench.
- Remove the mushroom from the top of the group, along with the Teflon seal and set aside.
- Grab the new mushroom that came with the Quick Mill E61 flow control kit and unscrew the black knob. Now remove the knob and cap before inserting the mushroom into the top of the group.
- Replace the Teflon seal that was removed in step three with the new seal that was included with your flow control kit. Install the new mushroom and tighten.
- With your hand, turn the post that has been exposed after removing the black knob and cap clockwise until hand tight. This is ensuring that the needle valve is completely closed in this position or ‘off’ as we’ll refer to it.
- Now that the valve is in the closed position, set the cap with the black knob attached back on the post you just tightened. Once placed on the post tighten the black knob. This will maintain the position of the cap so as you start to adjust flow the cap does not move positions.
- With the 5mm Allen wrench unscrew the Allen screw on the front-center of your E61 group.
- Remove the Teflon seal and install it on the backside of the gauge.
- Wrap Teflon tape around the threads below the Teflon seal a couple of times and finger tighten the pressure gauge on the front of the group to lock it into place.
- Wrap electrical tape around your discharge spout and loosen the nut closest to the top of the spout until removed.
- Once the discharge spout has been removed, remove the preinfusion valve. Replace the brew valve spring that surrounds the preinfusion valve with the spring that was included in the E61 Group Head Flow Control Device Kit.
- Once the brew valve spring has been replaced around the preinfusion valve and inserted back into the discharge spout, tighten the discharge spout back into the bottom of your E61 group, and you’re ready to start up your espresso machine!
Commercial equipment & coffee are NOT eligible for returns or exchanges.
Read Full Shipping Policies & Full Refund Policy Here.
Please Note: Chris' Coffee will not be responsible for any delivery delays due to unforeseen circumstances outside our reasonable control such as delays due to severe weather, natural disasters, strikes, etc.
For any questions or concerns please email support@chriscoffee.com
