
How-to Install a Steam Arm On a La Marzocco GS3
Before starting to install your steam arm on your La Marzocco GS3 it is very important to unplug the machine from the outlet. Release the steam pressure before starting as well by opening the steam valve and then let your espresso machine cool.1
Tools Need for Installation
- Phillips Screwdriver
- Flat Blade Screwdriver
- Small Adjustable Wrench
- Medium Adjustable Wrench
- 13mm Socket with Ratchet
- Hand File: the hand file may be needed to file the valve down for a proper fit. Some valves may not require filing, but it is recommended to have one available before starting.
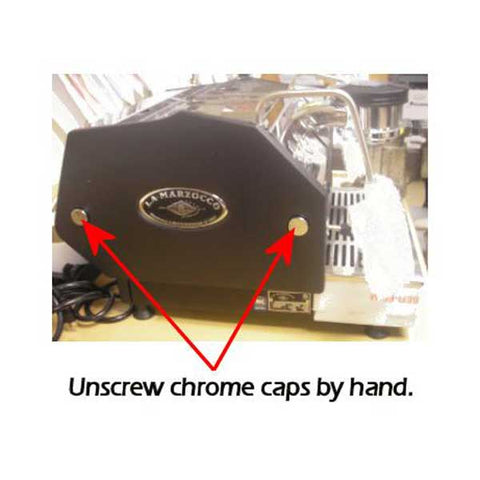
1. Remove the Left Side Panel
Unscrew the chrome screw cover caps that cover the panel screws. Once the chrome screw caps have been removed, unscrew the 13mm nuts with the 13mm socket with a ratchet. The panels should pull off the side of the machine easily.
 |
|
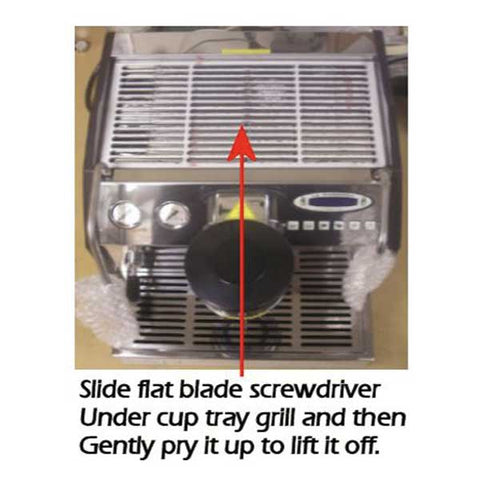
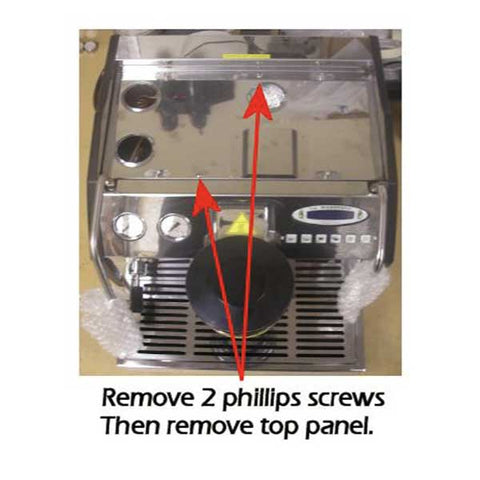
2. Removing the Top Panels
Slide the flat-bladed screwdriver under the cup tray grill. Gently pry the cup tray grill off of the top of your machine. After you've gently prayed and lift it off of your GS3, set it aside. Now, remove the two Phillips screws located at the front just left of center and rear center underneath the tray grill that you've just removed.
|
 |
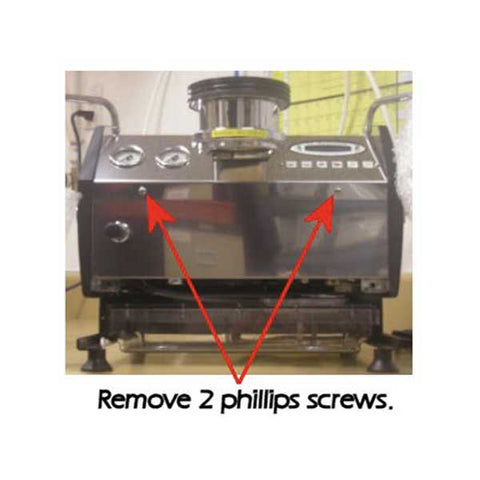
3. Remove the Front Panels
Removing the front panels makes it much easier to replace the steam valve. This step may be skipped if you have small open-ended wrenches. If not, it is much easier with the front panels removed.
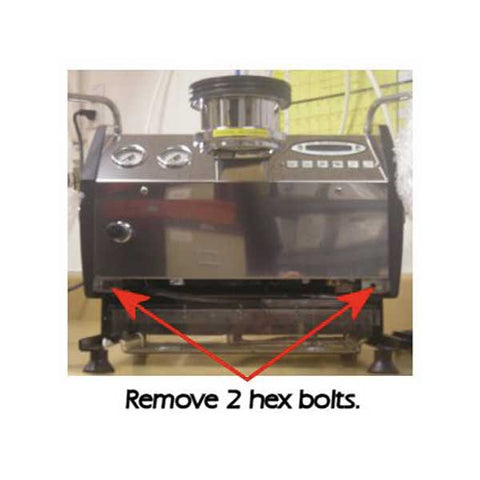
To remove the front panels on your GS3 remove the two Phillips head screws located on the front just after the bend underneath the controls of your machine. After the two screws have been removed remove the two hex bolts just underneath the front panel. These hex screws hold the front panel to the frame of your espresso machine.
|
 |
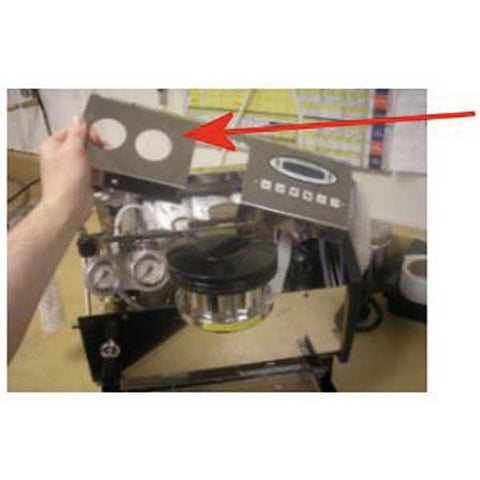
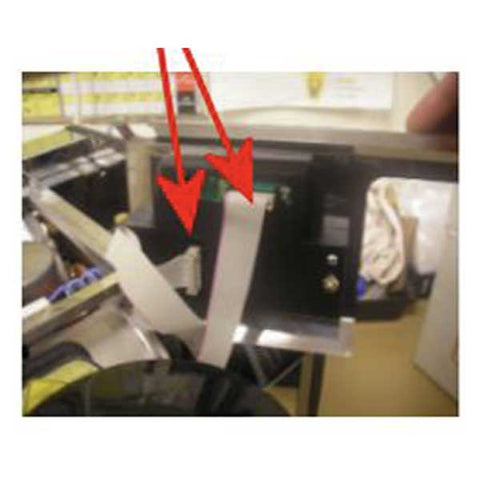
To continue removing the front panels, carefully lift the left side by the manometers as shown below. Be very careful not to disconnect the cables behind the touchpad. The cables two cables connecting the touchpad are identical and will be very difficult to determine how to re-install if you do not label them with a marker before disconnecting them.
|
 |
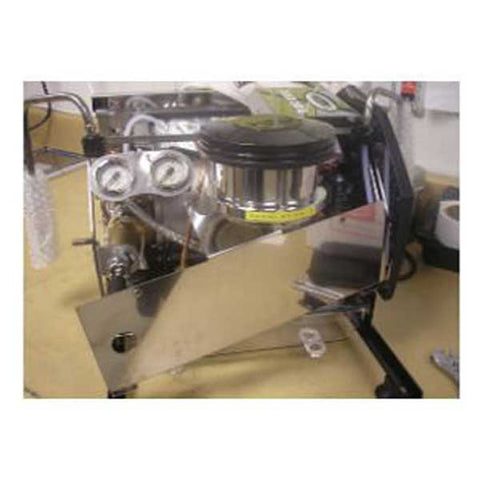 |
Pull the left side of the bottom panel forward. You may have to push the discharge tube on the bottom left of the panel up to relieve the bottom panel just underneath the La Marzocco GS3's group. |
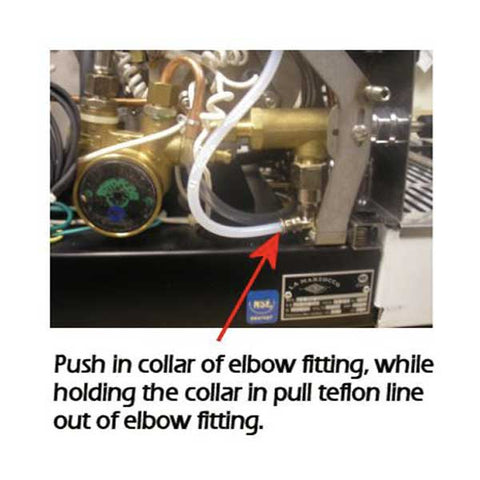
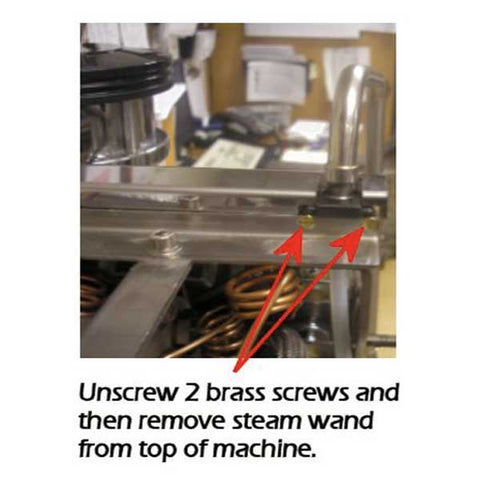
4. Remove the Steam Wand
With all of the panels remove now we're ready to remove the existing steam wand. Just behind the lever to activate your steam arm, there is a small elbow fitting attached to some tubing. Push in the collar of the elbow fitting and pull the Teflon line out of the elbow fitting.
Now unscrew the two brass screws just behind the steam wand from the top of the machine.
|
 |
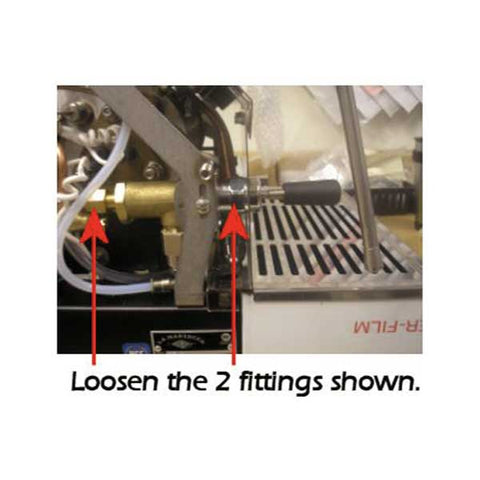
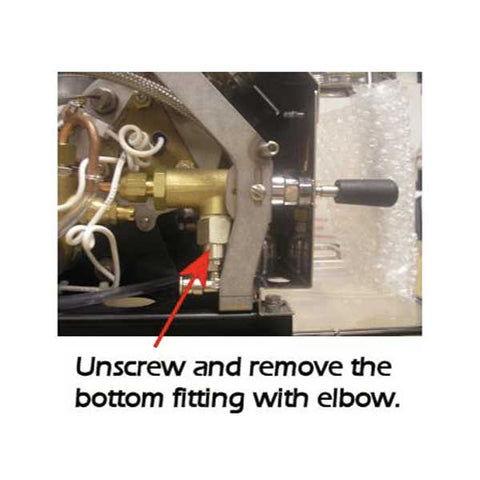
5. Position the Steam Valve
Loosen the two fittings on either side of the steam valve. One inside of the machine and the other that's closest to the knob and front of the machine. After loosening the fittings on either side of the steam valve, unscrew and remove the bottom fitting on the steam valve just above the elbow that you removed the Teflon line from.
|
 |
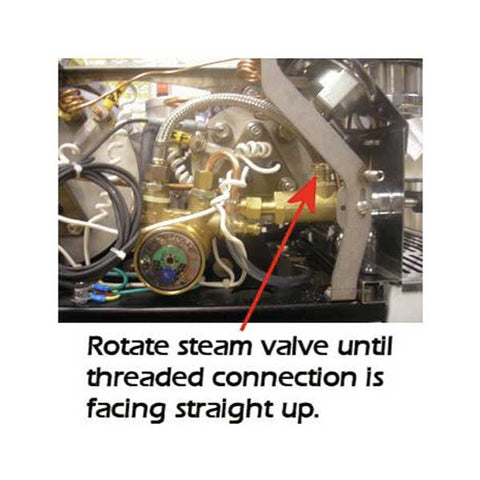
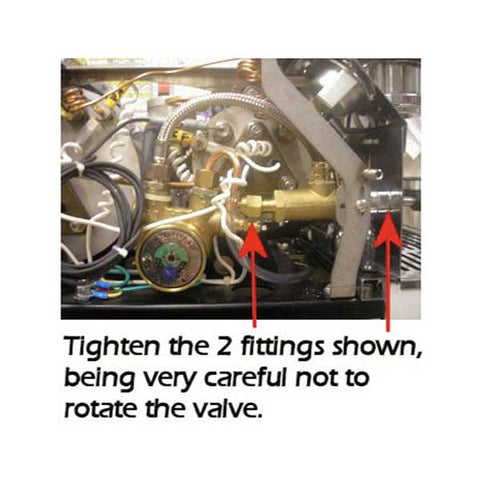
6. Install the Steam Wand
Once you have removed the steam valve, we are ready to install the new valve. Screw-in and rotate the steam valve until the threaded connection is facing straight up towards the top of the machine. With the threaded connection facing straight up, tighten the same two fittings you loosened in step-5 and as indicated below. Be very careful that while tightening the two fittings be sure that you do not rotate the valve where it forces it to not have the threaded connection pointing straight up.
|
 |
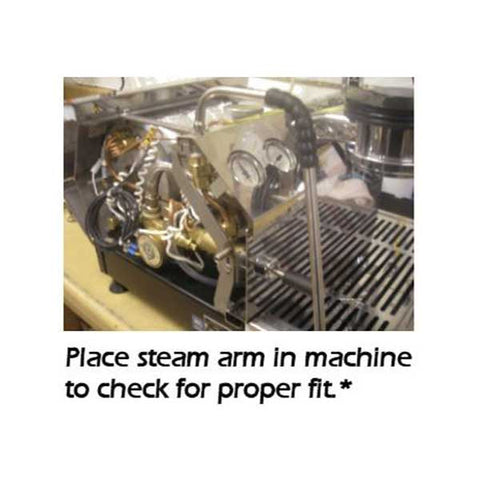
7. Fitting & Modifying the Steam Wand
Place the steam arm into the La Marzocco GS3. Once the steam wand has been properly placed where the other wand was, install and tighten the two brass screws that were removed in step four.
|
 |
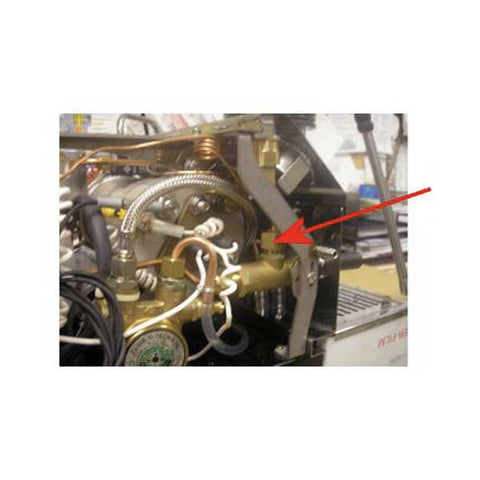 |
Screw the copper line to the top of the steam valve. Check that all fittings to make sure that they are tight. Reassemble all panels except for the left side panel. |
Turn on your espresso machine and be very careful of the live voltage and heat. Let the machine heat up and check for signs of any leaks. If you do observe a leak unplug the machine and tighten the fitting at the place where you have observed the leak. When there are no observable leaks re-install the left side panel.
Download the Guide on How-To Install a Steam Arm on the La Marzocco GS3
1. Chris' Coffee Service and La Marzocco assume no responsibility for injury or damage as a result of failing to follow the instructions.
